Crawl space encapsulation is a method used to protect your home from moisture damage by sealing the crawl space with a waterproof barrier. Here are the steps to a dry and encapsulated foundation…
1. PREPARE THE AREA

Before installing an encapsulation, the area must be cleaned of mold and wood rot. Mold can be cleaned with products from home improvement stores that have properties similar to bleach. Dry rotted wood needs to be replaced and columns that have sunk down need to be restabilized. If there is a lot of standing water, a temporary pump may be needed to pump it out.
2. DIG DRAINS

The next step is to ensure there is proper drainage in the area. This can be accomplished by installing a French drain (named after it’s inventor, Henry French), which is sometimes called pipe and gravel. Ditches are to be dug just inside the perimeter of the foundation. Then a perforated pipe is inserted into the ditch. Then the pipe is covered with gravel. This allows water to seep down through the gravel, caught by the plastic pipe, and when installed at the correct slope, will allow the water to run down hill and out a drain or to a sump pump.
3. INSTALL EXIT LINES OR SUMP PUMPS

Depending on the terrain of the home’s landscape, the water collected by the French drain can go to either a simple exit pipe or a sump pump. An exit line depends on gravity to allow the water to exit. A sump pump employs the use of electricity to pump the water out. In either case, the water travels out of the home through a pipe that travels far from the home to avoid risk of it coming back in due to proximity. Often there is an end to the pipe, which prevents critters from entering the foundation, looks better, and is less of a tripping hazard. Many homeowners additionally install a DC powered sump pump to prevent flooding even if the power goes out.
4. SEAL FLOOR, WALLS, AND VENTS


Once the drainage system and the sump pump are in place, the next step is to seal the floor, walls, and vents of the crawl space. This should be done with a high quality, waterproof material that prevents moisture from entering the area. Special consideration must be made about how to attach the plastic liner to the different surfaces of a crawl space, but there are several ways to do so. The sections of liner must also be taped in such a manner that they overlap enough and are in the correct layering order. It can be a challenge to seal the vents in a way that lasts. Often two inch thick foam insulation is used. Code requires a several-inch gap be left at the top of the encapsulation so that a pest inspector can look for termite tubes.
5. INSTALL DEHUMIDIFIER
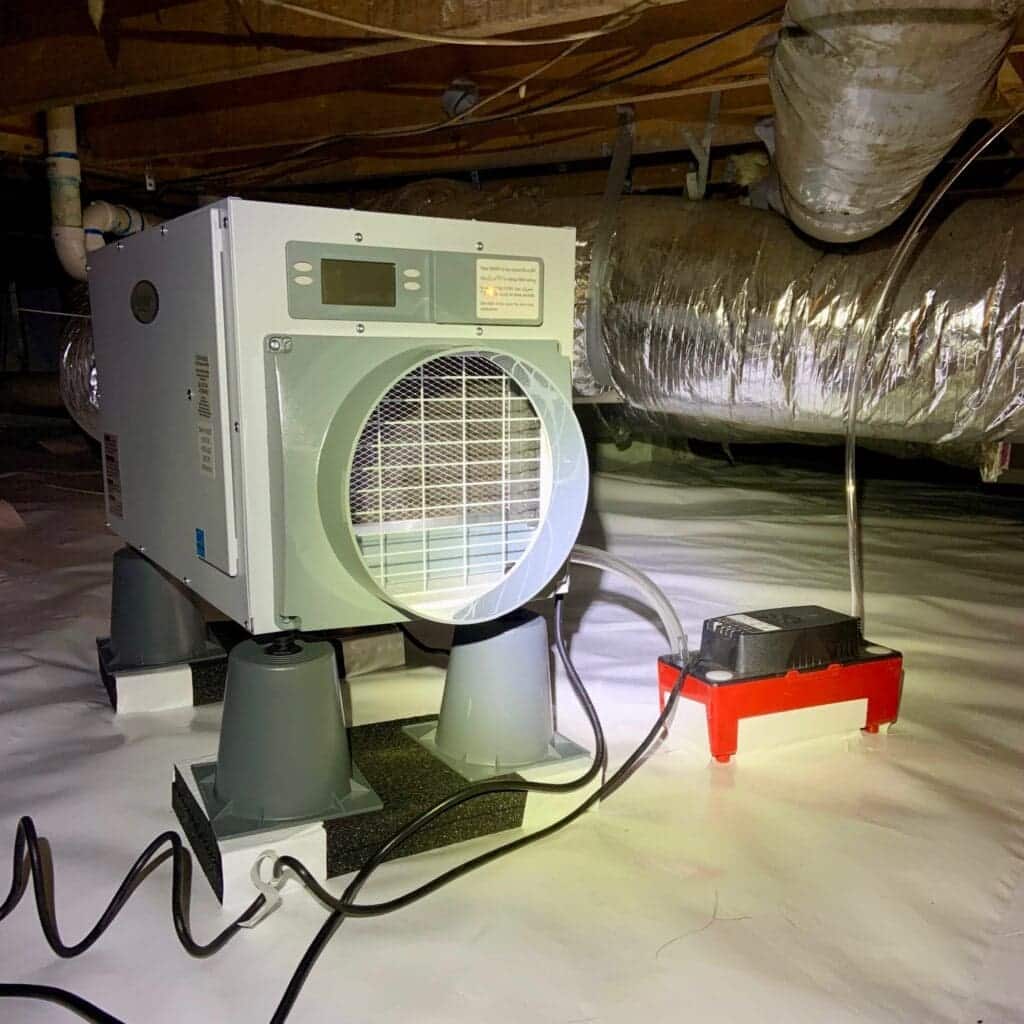

After the crawl space has been sealed, a dehumidifier should be installed to help regulate the humidity. When considering which dehumidifier to purchase, research the warranty and size. Dehumidifiers come in sizes based on the amount of pints of air they can handle. When the right dehumidifier is selected, no matter how humid the weather is, the crawl space air will be safe from high humidity.
6. INSERT RELATIVE HUMIDITY SENSOR AND MONITOR
After a crawl space has been properly drained, sealed, and dehumidified, you should have no worries about the crawl space. But there is a way to be sure about the crawlspace humidity without having to go in it. A wireless weather station can be used for this. These can be purchased at hardware stores. They come with two parts; a monitor that has read outs about the temperature and relative humidity, and a sensor that you can put outside so the monitor can sense the weather outside. But if the outdoor sensor is in the crawl space, hanging from a floor joist and in a central location, it will connect to the indoor monitor and provide 24/7 results about the relative humidity under the home. A day or two above 70% is cause for concern that maybe your dehumidifier has lost power or stopped working and should be addressed.
OTHER CONSIDERATIONS
Each crawl spaces is different and must be treated as so. Some homes have furnaces. Furnaces require fresh air from outside of the foundation to be piped into the furnace for optimal combustion. Particularly large crawl spaces may need two dehumidifiers, or may need ducts to extend the circulation area of the dehumidifier. And homes with porches have to be evaluated for the best remedy to seal off the foundation of the porch.
MAINTENANCE
Encapsulations are meant to last the lifetime of the home, but they do require some maintenance. Sump pumps need to be checked to make sure they are working ever so often. And dehumidifiers need the filter to be cleaned or replaced every six months or annually. And it is a good idea to inspect the entire foundation periodically to make sure everything is as it should be.
A crawl space encapsulation is an effective way to prevent the horrible consequences of having a leaky foundation By following the steps above, homeowners can create a dry, clean environment that is resistant to mold, pests, and other moisture related issues. If you are considering encapsulating your crawl space, but don’t want to do it yourself, know that Dry Otter Waterproofing provides free inspections and premium service.


